
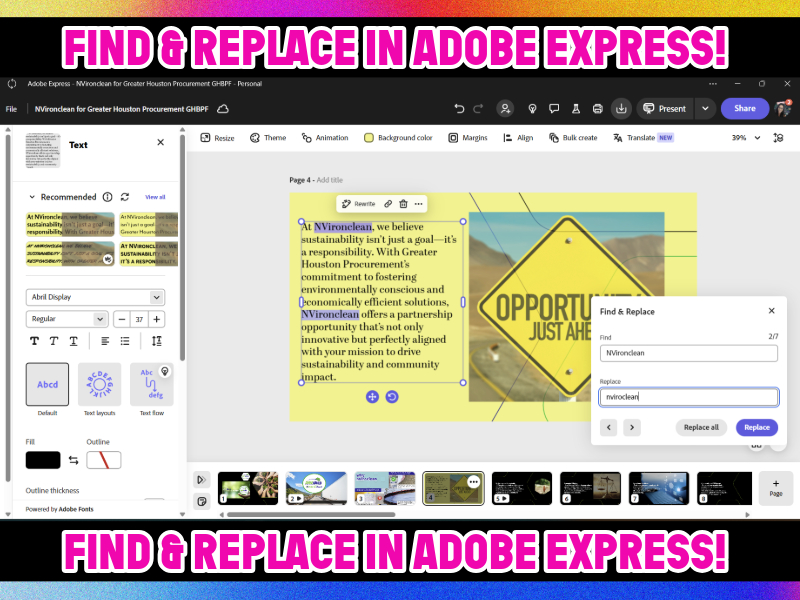

Ready to Master Text Updates in Adobe Express? Here’s Your Ultimate Guide to Find & Replace 🖌️✨
Consistency is key when working on designs, and Adobe Express makes it easy to update or fix text quickly using the Find & Replace feature. Whether you’re correcting a typo or replacing a term throughout your project, this tool is a lifesaver. 💡 Here’s how you can master it:
Step-by-Step Guide to Using Find & Replace
- Open Your Project 📂
- Launch Adobe Express and select the project you want to edit.
- Access the Text You Want to Edit 🖋️
- Click on the text box containing the word or phrase you want to update.
- Use Find & Replace 🔍
- Quick Access for Typos:
- Select the misspelled word by clicking on it.
- Right-click to bring up the context menu.
- Choose Find and Replace from the dropdown list.
- Enter the correct word in the Replace field.
- Select Replace One for a single correction or Replace All to fix all occurrences.
- Quick Access for Typos:
- Navigate Through Matches ➡️
- Use the Next and Previous buttons to review each instance before making replacements.
- Confirm Your Changes ✔️
- Click Replace to finalize your updates.
- Always double-check your project to ensure everything looks perfect!

Pro Tips for Success
- 📝 Spot Typos Faster: Use this feature to quickly scan for and fix common spelling errors.
- 🔄 Batch Updates: Save time by replacing multiple occurrences of a word across your design in one go.
- 💡 Context Matters: Be cautious when replacing common words to avoid unintentional edits.

By using Find & Replace, you can handle text updates like a pro, ensuring your designs stay polished and error-free. 🎨✨
Hashtags: #AdobeExpress #DesignTips #FindAndReplace #TextEditingMadeEasy #GraphicDesign
You must be logged in to post a comment.